Blog Posts And Announcements
How to create a new blog post or announcement.
First make sure you have logged in as admin and your dashboard is visible in the left hand sidebar. (Put your cursor on the link in the upper left corner displaying your name. It will open a dropdown menu that includes an entry for dashboard. Click on that).
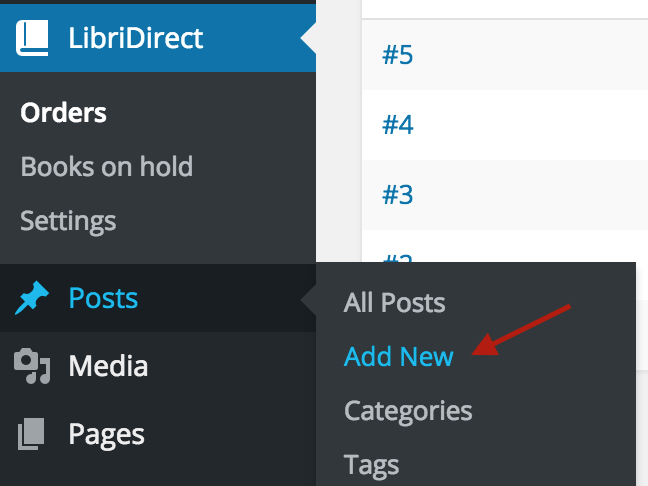
1 - In the menu on the left side there will be an option named "Posts." Move your cursor over this to open another menu. One of the options will be "Add New." Click on that.
2 - A new screen named "Add New Post" will be displayed. and your cursor will be flashing inside a box that says "Enter Title Here'. Enter in this space the title or headline you want to appear at the top of your blog post or news item.
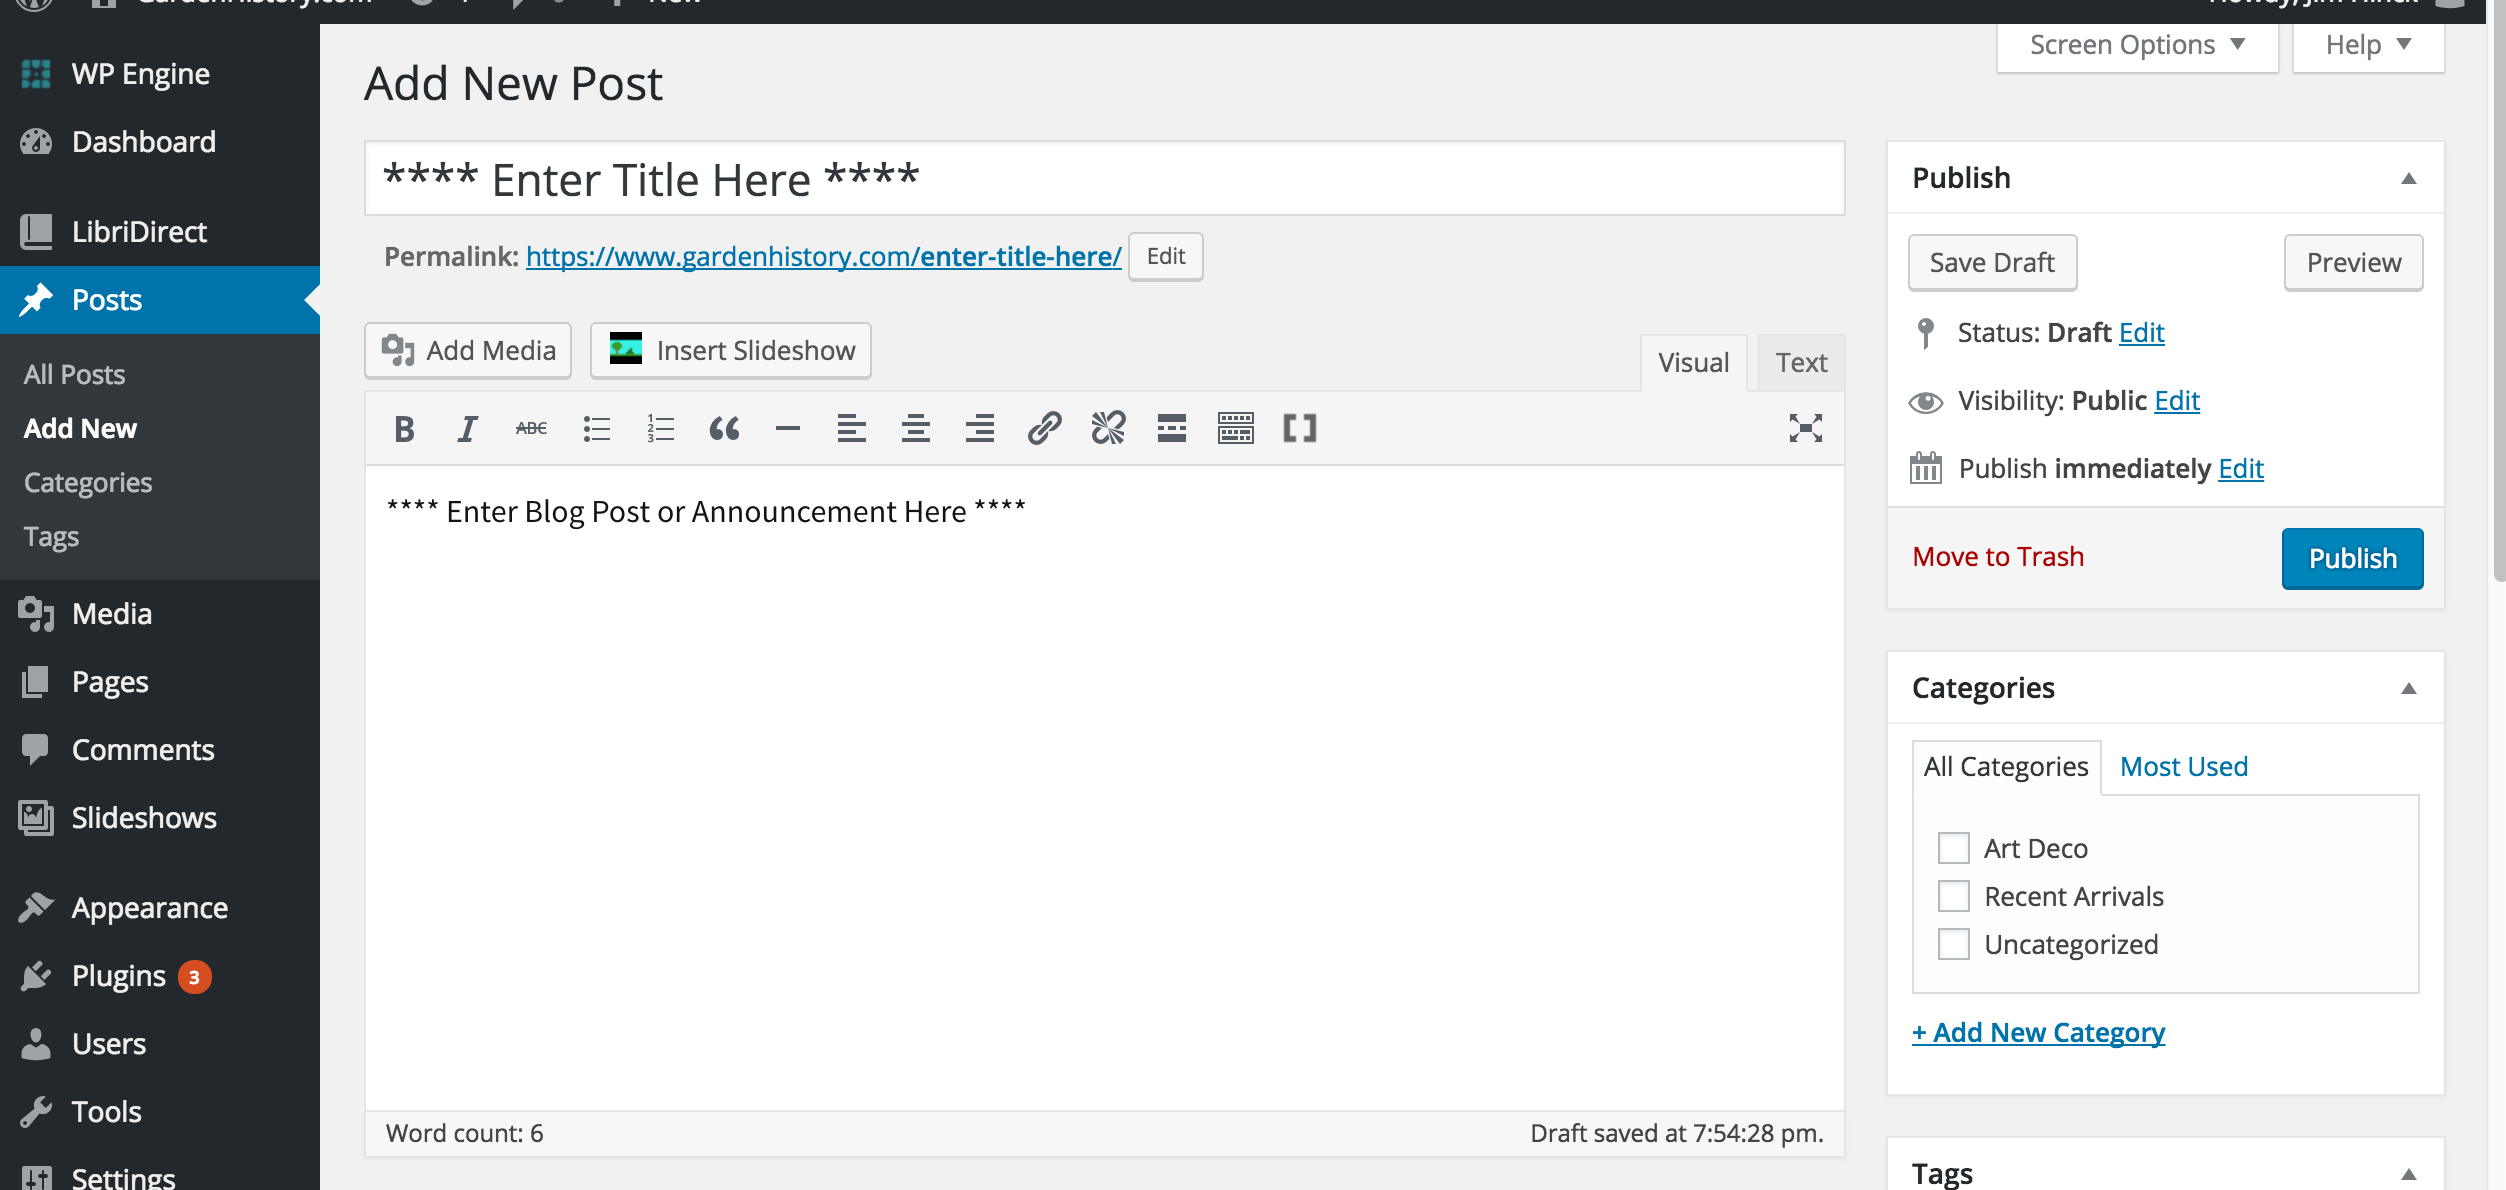
3 - The cursor will move to a large empty space. Type in this space the text for your blog post or news.
There are multiple formatting options that are available to enhance the appearance of your text. They are shown as buttons above the entry screen. For example, the button button marked "b" will make the text bold. You click the button before typing the text to start the bold text, and then click it again to turn the bold off.
On the right side, directly above the editing panel, there will be two tabs marked "Visual" and "Text." If you click on the
Visualtab the formatting options will appear as icons and the text you enter will be be shown as it will appear on the blog. If you click the "Text" tab then any formatting you choose will appear here as HTML markup codes. You can also highlight a section of text and then click a button to apply the selected formatting to the highlighted text. The HTML codes that may be used in blog posts are not limited to the ones shown on the screen.
![]()

4 - You can also include visual media in your post. This will generally mean adding photos, although
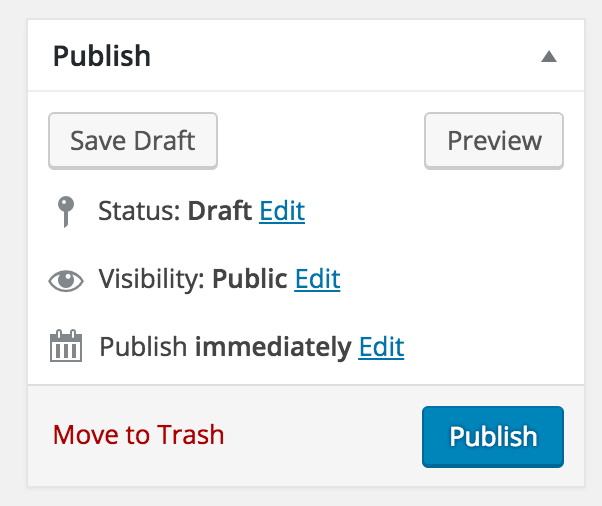
5 - When you have finished creating or editing your post you will want to preview, save and publish it. In the sidebar on the right side of the screen there is a Publish action box which can be used to do this. These options are available:
- Save Draft. The text you have written or edited will not be saved until you click this button. If you try to leave this screen without saving your new or revised entry you will receive a prompt warning you that you will lose your data. Your options are to "Stay on the Page" or "Leave this Page." If you want to discard your changes you can leave. Otherwise you should Stay on the page and click the Save Draft button.
- Preview. You can click this button to see a preview of how your page will look in its current state.
- Status. Generally this will either be "Draft" (you are still working on it) or "Published."
- Visibility This will generally be "Public," unless you want blog posts or announcements that are only open to subscribers or staff.
- Publish immediately gives you the option of delaying publication of your post until a later date.
- Publish (or Update) Button. You click this when you are ready to have your blog post or announcement appear on your site.
6 - Below the Publish action box is another one called "categories." You can assign categories to your posts or announcements to help visitors find items on specific topics. You will have to create new categories yourself, while check boxes for existing catagories will be shown. These catagories will be unrelated to the categories you may have assigned to your books.
Your blog posts/announcements can, of course, be edited after they have been published. If you have logged in as an administrator and you open one of you posts you will see, at the bottom the the screen, the word "edit" along with a small pencil. Clicking on this is an easy way to open the post and make any changes you want. When you are finished be sure to click the Publish button again or your changes will not be saved when you exit the page.
Other more advanced features are also shown futher down on the screen. These are all optional and will not be used by most booksellers. Consult the wordpress.org site, or one of many published guides, if you want information regarding how these features are used.
Your blog will generally be included as a menu item installed when your website is first set up. It can also be set up as the home page if desired. For further details see the section about menus.