Managing images.
Adding Images to website content.
Images are an important part of the content that makes your website appealing to visitors. Images can be added to announcements, blog posts and any content created in a page or post format. They can also be added directly to a sidebar.
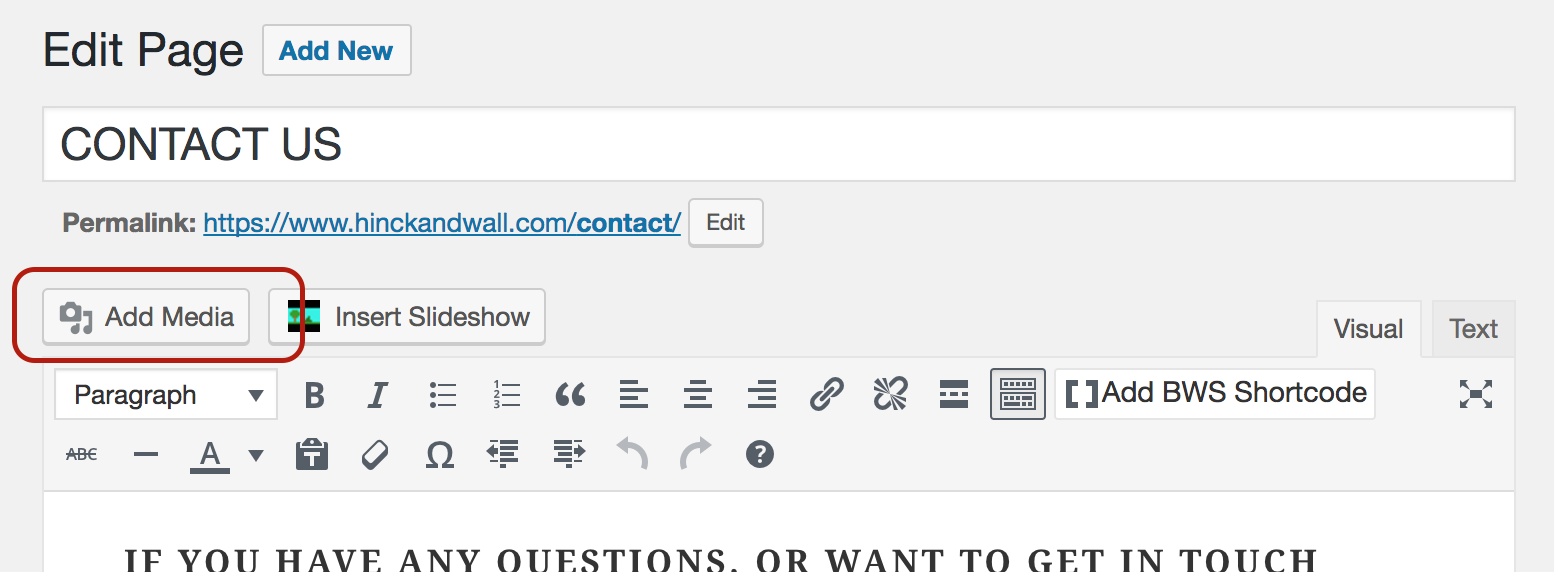
There are several different ways to add images to your site. The images that appear with book descriptions are displayed automatically and do not require instructions. But adding images to posts or pages is also simple. When adding or editing a page or post just move the cursor to the position where you want the image to appear and then click on the button marked Add Media.
The Insert Media screen will appear and you will see two tabs labeled Upload Files and Media Library.
If Upload Files is selected you will be shown two options:
- Drop files anywhere to upload. You can drag a file from your file manager and drop it anywhere in the box on the screen. It will then appear on the
Insert Mediascreen, with a check mark in the corner, along with the other items in your Media Library. You can add multiple images to your Media Library in this way. When you have uploaded and checked all the items you want to insert you must then click the button labeledInsert into page. - Select files. This is basically the same process described above, except that you must find the file in your file manager and open it to select it.
If Media Library is selected then you will be shown a grid with all the images that have already been saved in your media library. To add one of these to your post or page you need to click on it, so that it has a check in the corner, and then click the Insert into page (post) button.
Once the images have been inserted they can be dragged to the position where they wanted.
Adding images directly into the Media Library.
You can also load images directly to the media library without having to start from a page or post.
1- In your dashboard, move the cursor to the Media option and then click Add New. The Upload New Media screen will be displayed.
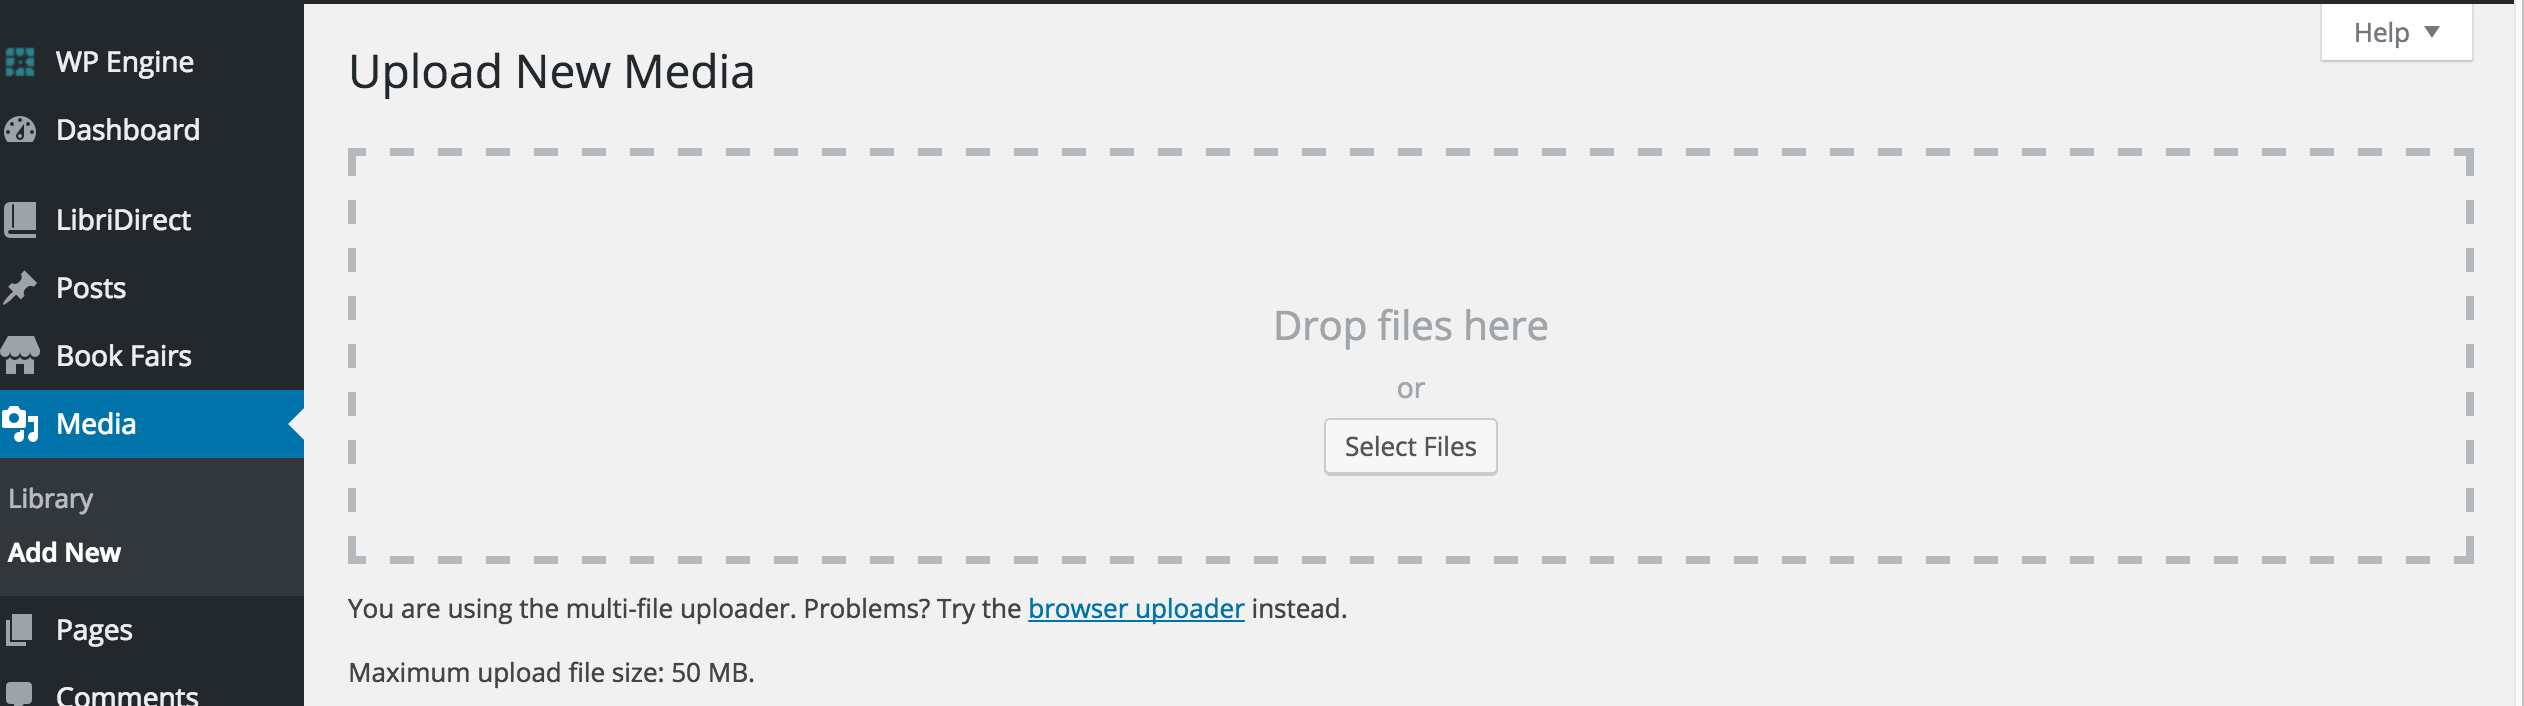
2 - From this screen you can upload files in one of two ways.
- You can drag a file (or files) from your file manager.
- You can click the
Select Filesbutton and upload selected files.
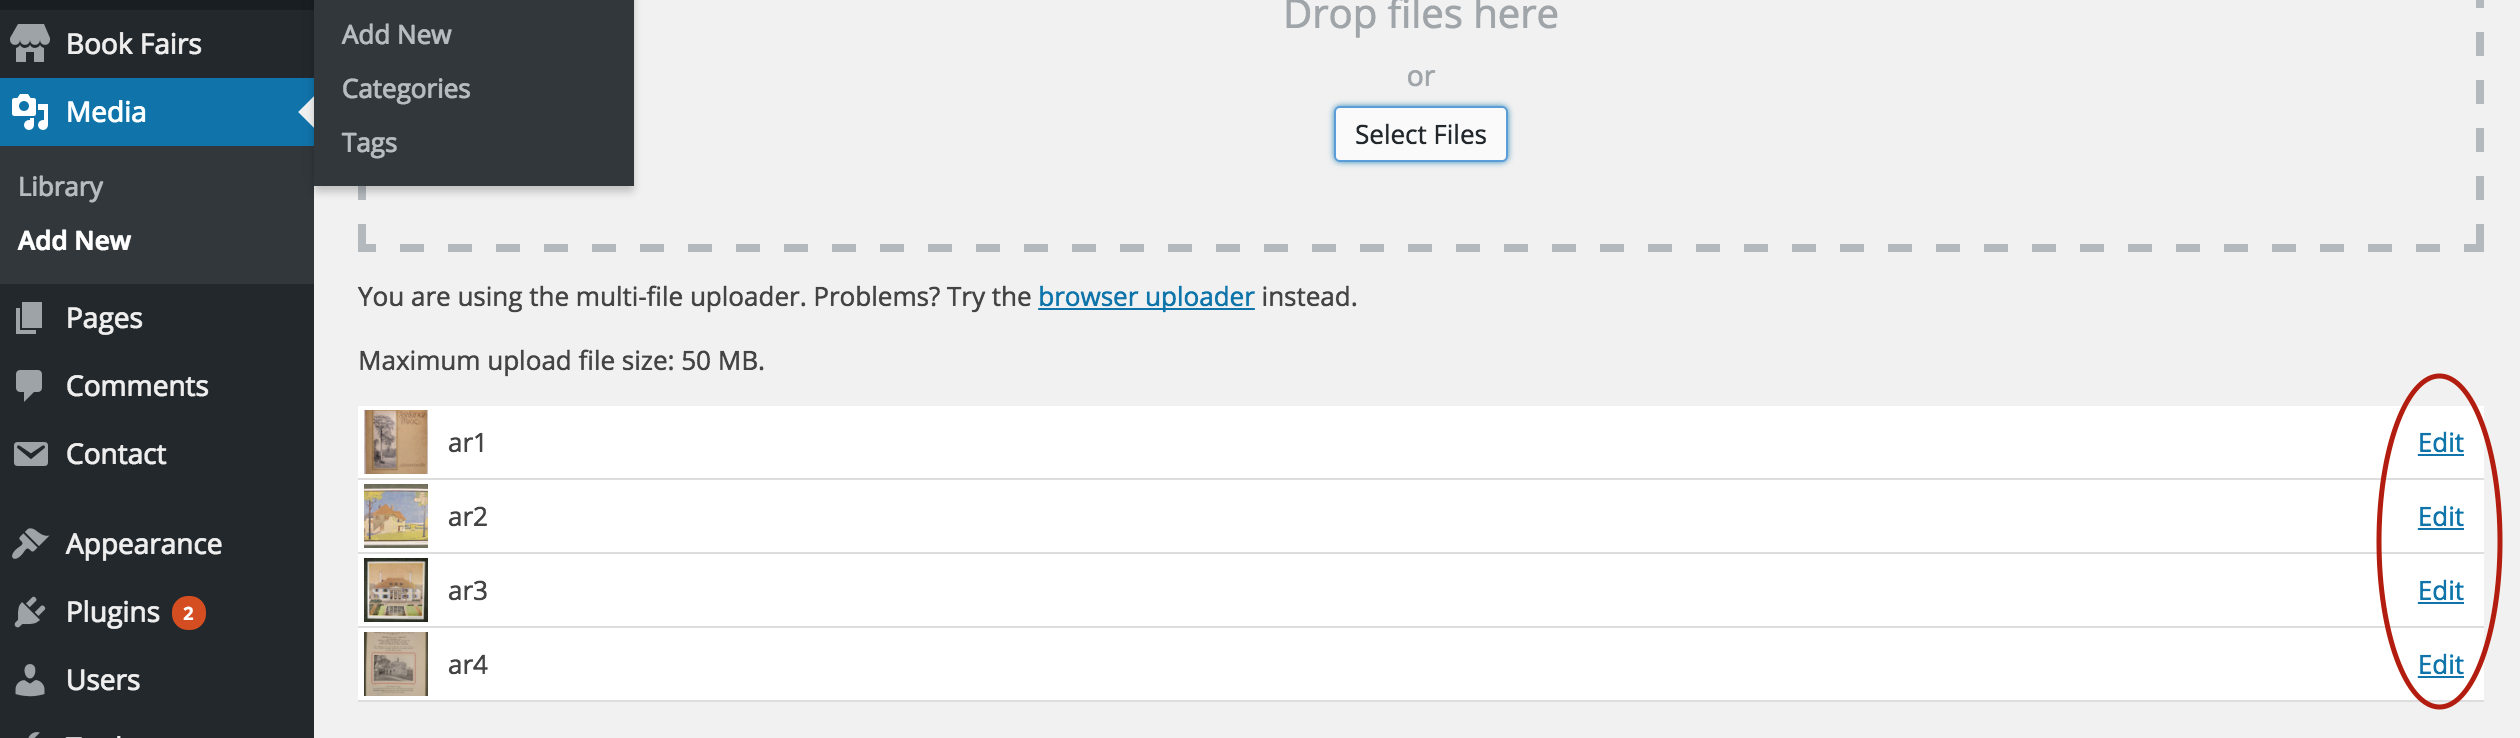
3 - Your files will now be displayed below the upload box. Repeat this process until you have uploaded all the images you plan to use. You can then edit the individual images, if necessary, by clicking on the Edit links at the right side of the page.
4- An Edit Media screen will now be displayed where you can add a caption and description to your image. There is also button labeled Edit image underneath the image which you can click if you want to make modifications to the image itself.
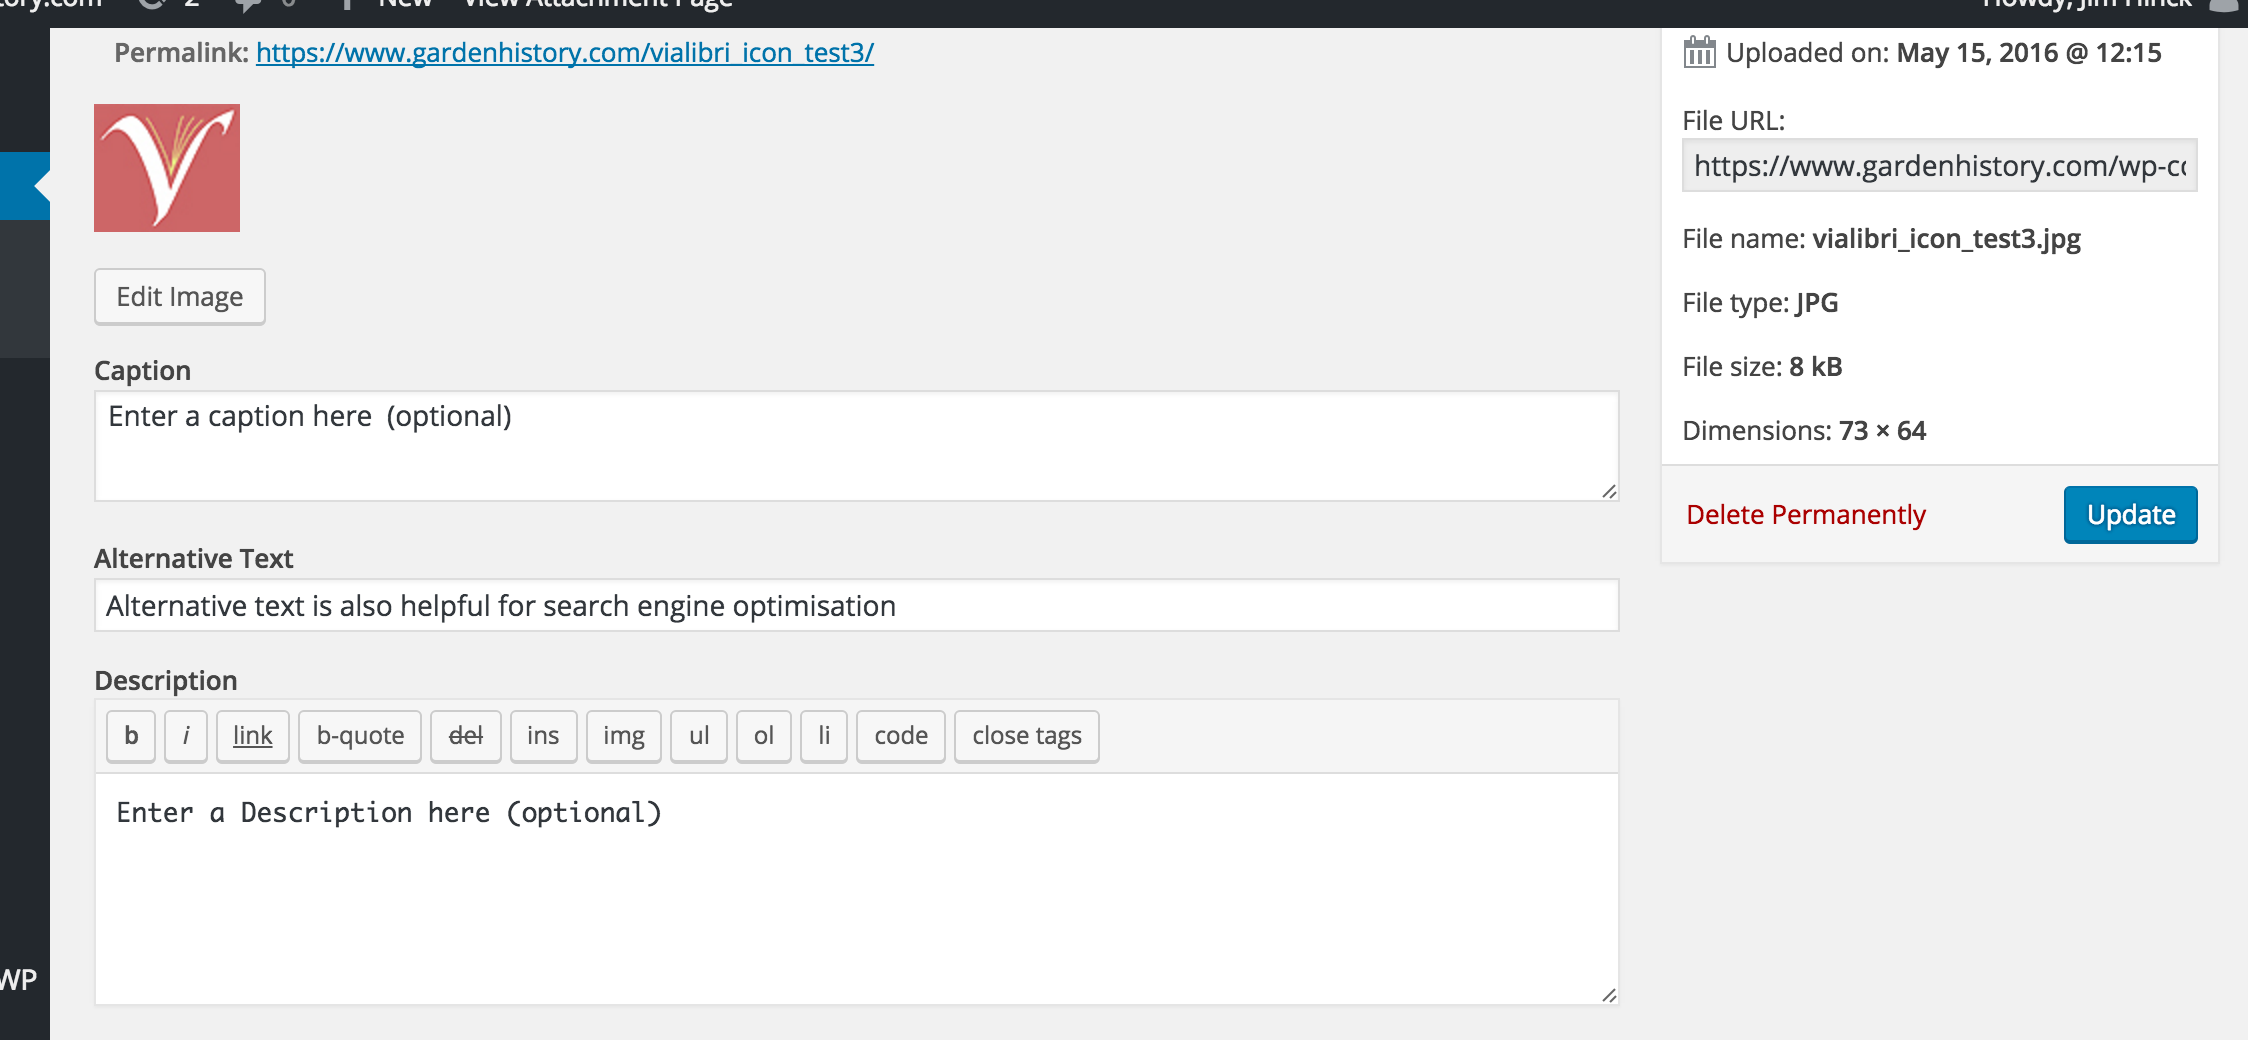
5 - This screen allows you to make changes to the image such as re-sizing, cropping and rotating.

6 - Click Save and your image will be ready to use where ever you have need for it.